Address
304 North Cardinal St.
Dorchester Center, MA 02124
Work Hours
Monday to Friday: 7AM - 7PM
Weekend: 10AM - 5PM
Address
304 North Cardinal St.
Dorchester Center, MA 02124
Work Hours
Monday to Friday: 7AM - 7PM
Weekend: 10AM - 5PM

Installing marble inlay flooring is a delicate process that combines precision, craftsmanship, and artistic design.
Whether you’re enhancing a grand foyer or creating a custom accent for a luxury villa, proper installation is key to achieving long-lasting beauty.
How do you ensure your marble inlay flooring is installed flawlessly and stands the test of time?
Follow our expert step-by-step instructions to transform your space with confidence.
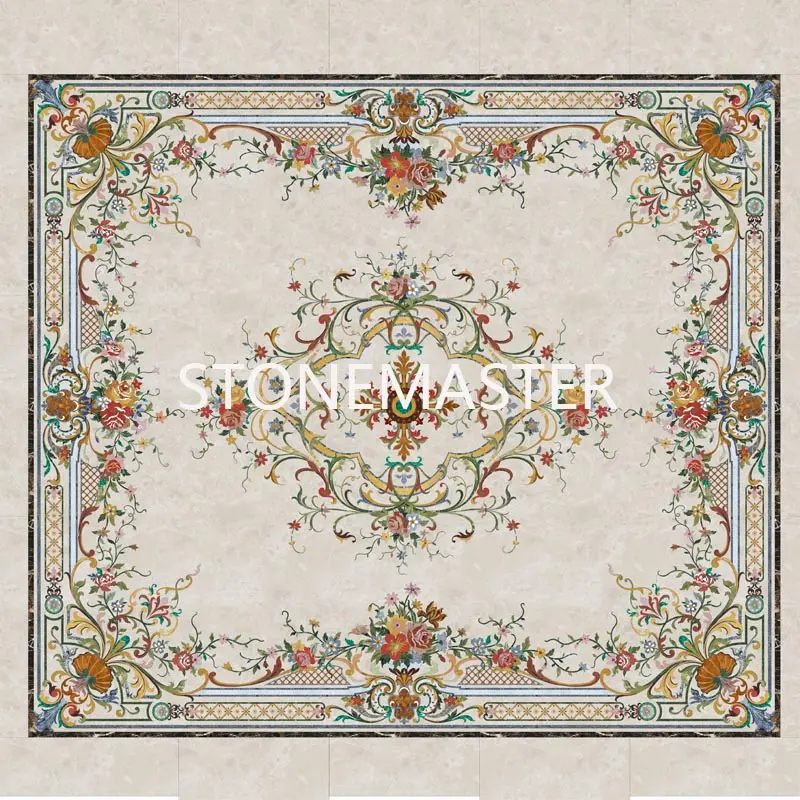
Marble inlay flooring is a decorative stonework technique that involves setting cut pieces of colored marble into a contrasting marble base.
It creates intricate floral, geometric, or custom designs on the floor surface.
This craft, also known as Pietra Dura, originated from Mughal-era palaces and European Renaissance interiors.
Modern applications of marble floor inlay blend traditional techniques with new-age customization.
A marble inlay floor can transform ordinary spaces into artistic masterpieces.
Because the patterns are embedded into the stone, the design becomes a permanent feature.
Marble inlay flooring is prized for its timeless elegance and visual richness.
It’s also one of the most customizable flooring techniques in luxury architecture today.
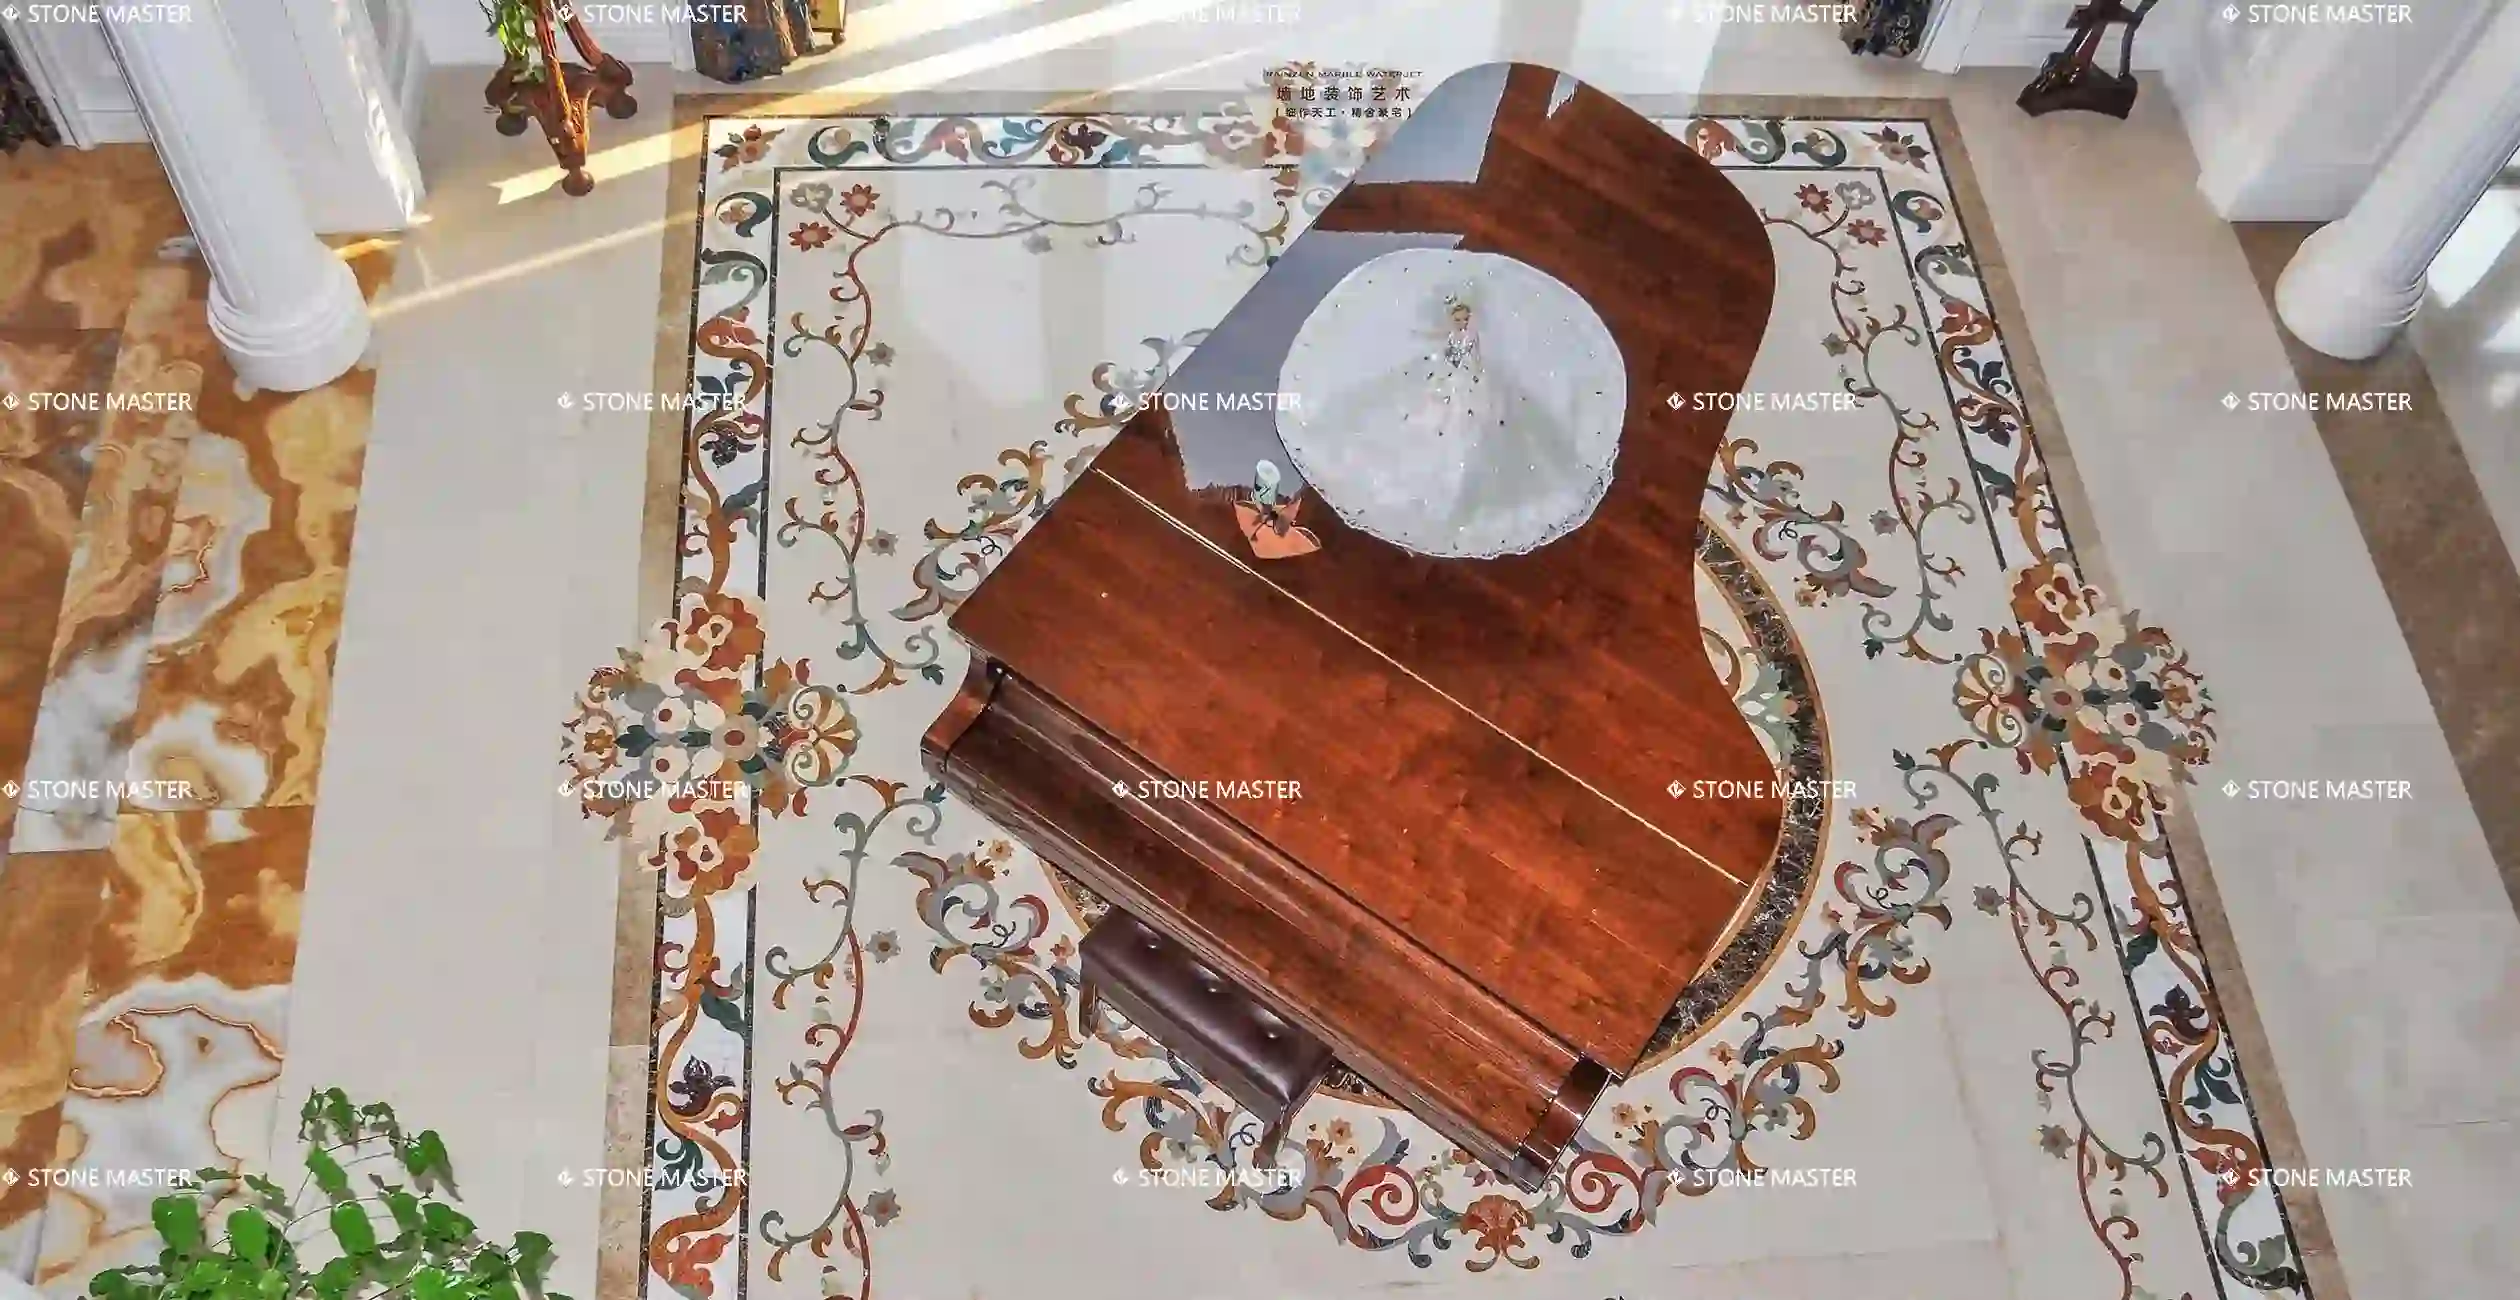
Marble inlay flooring is typically used in luxury residences and premium commercial interiors.
Common spaces include villa entrances, lobbies, foyers, and grand corridors.
It’s especially popular in formal living rooms, dome halls, stair landings, and even around indoor pools.
A custom marble inlay floor elevates the first impression of a home’s entryway.
In luxury hotels, floor medallions in lobbies create a sense of grandeur and exclusivity.
Corridor marble inlay floor designs add rhythm and sophistication to passageways.
Even bathrooms and dining rooms can incorporate delicate marble floor inlays for elegance.
No matter the space, marble inlay flooring adds an unmatched aura of craftsmanship.
Proper installation is essential to unlock the full beauty and longevity of marble inlay flooring.
Inlay designs require millimeter-level accuracy during layout and placement.
Misalignment, uneven bonding, or poor subfloor prep can compromise the entire artwork.
Marble floor inlays are permanent and expensive—mistakes can’t be easily corrected.
A precise installation ensures the tiles are flush and the pattern reads clearly.
It also prevents water infiltration, cracks, and future maintenance issues.
Professional installation protects your investment and maintains aesthetic harmony.
In short, perfect execution is the foundation of a perfect marble inlay floor.
To install marble inlay flooring with accuracy, precise measuring and marking tools are essential.
Whether you’re working on a small foyer medallion or a full-scale marble floor inlay, layout perfection starts here.
Key tools to prepare include:
These tools help ensure each inlay element is correctly placed according to the design plan.
For symmetrical marble inlay floor patterns, it’s vital to double-check every reference line.
Perfect alignment ensures visual harmony and reduces the risk of future cracking or lifting.
Securing your marble inlay flooring requires high-performance adhesives and tools tailored for stone.
The right bonding materials create long-term durability and a seamless finish.
Recommended materials include:
Each adhesive has a specific purpose, based on tile size, subfloor material, and environmental conditions.
Proper bonding prevents voids, uneven leveling, and moisture seepage—common issues in marble inlay floor failures.
The final stages of marble inlay flooring require precision cutting, clean grouting, and a polished finish.
Using the correct tools will bring out the artistry of your marble floor inlay and extend its life.
Here’s what you’ll need:
These tools allow for seamless integration of complex patterns and color transitions in your marble inlay floor.
Careful finishing ensures no adhesive residue, crisp grout lines, and a luxurious final presentation.
Professional tools make the difference between an average and truly exceptional marble inlay flooring result.
Before installing marble inlay flooring, site inspection is the first and most critical step.
A well-prepared subfloor ensures proper adhesion and long-term performance.
Make sure to assess the following conditions carefully:
A marble inlay floor installed on an uneven or moist surface risks cracking or debonding.
Professional contractors often use leveling compound to correct imperfections.
If installing on a wall, ensure it’s plumb and reinforced for weight.
Thorough inspection reduces risk and sets the stage for a flawless installation process.
Start strong, and your marble inlay flooring will last beautifully for decades.

A carefully planned layout guarantees that your marble inlay flooring appears balanced and harmonious.
Start by reviewing your inlay pattern, size, and medallion positioning.
Coordinate with your interior designer or architect to align the floor design with the room’s geometry.
This stage is especially crucial for large marble floor inlay projects in villas or hotel lobbies.
Improper alignment can distort the intended visual impact of the inlay.
Marking and dry-laying save time and help you visualize the finished result.
Remember, the beauty of a marble inlay floor lies in both its art and its precision.
Confirming material quality and pre-fitting the design helps prevent costly errors during installation.
Each marble inlay floor is made of custom-cut components that must align perfectly.
Before installation begins, take these important steps:
Handling the inlay tiles correctly is equally important.
Always carry tiles vertically to avoid stress or breakage of the intricate design.
Never stack them flat—horizontal pressure may cause bowing and cracks.
With a careful material check, your marble inlay flooring project starts with confidence.
To install marble inlay flooring efficiently and precisely, having the right tools on site is essential.
Without proper tools, even the best marble floor inlay design may fail during execution.
Prepare the following for your installation:
Make sure all equipment is tested and ready before installation begins.
Clean, calibrated tools ensure smoother application, tighter joints, and better finishes.
With the right tools and preparation, your marble inlay flooring project will look professional and last a lifetime.
Preparing a sound and level substrate is the first step toward a flawless marble inlay flooring installation.
Any defects or unevenness in the subfloor will transfer directly to the marble inlay, compromising both aesthetics and structural stability.
Before installation, ensure the base is clean, level, and moisture-free.
Key preparation steps include:
Proper surface prep guarantees that each marble inlay floor element is supported evenly.
Skipping this step often leads to tile cracking, weak adhesive bonds, or poor alignment over time.
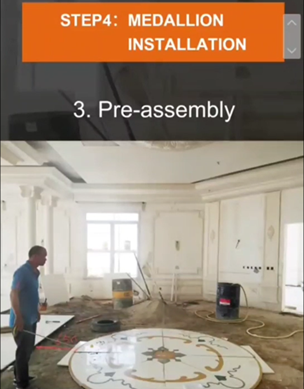
Before you permanently set your marble inlay flooring, a full dry layout is essential.
This stage lets you check positioning, pattern flow, and spacing without the pressure of wet adhesive.
It’s a crucial quality control measure in luxury marble floor inlay projects.
Steps to dry-lay your inlay:
Dry-laying reveals issues early—like miscuts or gaps—that can be corrected before final setting.
This process protects the visual integrity of your custom marble inlay floor design.
Selecting the proper adhesive is vital for both strength and color preservation in marble inlay flooring.
Natural marble is sensitive to certain bonding agents, especially darker adhesives that may stain or bleed through.
Adhesive recommendations:
A strong adhesive ensures each marble floor inlay remains stable and pristine for years to come.
The correct trowel size affects the bond strength and levelness of marble inlay flooring.
Too much or too little adhesive can lead to air pockets or lippage between tiles.
Common trowel size guidelines:
Always press tiles firmly and tap gently with a rubber mallet for full contact.
Proper trowel technique prevents voids and supports a level marble inlay floor surface.
Spreading adhesive the right way ensures accurate pattern alignment and full coverage beneath every tile.
Uneven thinset distribution can cause visible imperfections in marble inlay floors.
Follow this spreading method:
This method keeps your marble inlay flooring even, secure, and visually consistent.
Clean excess adhesive immediately before it dries to preserve edge detailing.
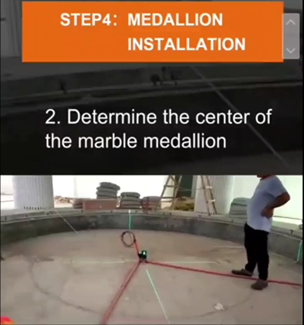
Correct placement of your marble inlay medallion is the centerpiece of your marble inlay flooring.
Aligning it perfectly to your layout ensures both symmetry and a professional finish.
This stage requires close attention to the intersecting lines, adhesive level, and surface height.
Key placement steps include:
Proper medallion installation ensures your marble inlay flooring looks seamless and balanced.
A precise fit enhances both durability and design impact, especially in focal areas like entryways.
To complete your marble floor inlay, you must dry-fit and cut surrounding tiles with care.
This step ensures the transition between the medallion and the rest of the flooring is smooth and cohesive.
Working around curves or intricate edges requires careful handling and marking.
Recommended process:
Dry-fitting ensures your marble inlay floor blends naturally with surrounding tiles.
It helps eliminate edge misalignment and enhances the overall geometry of the floor design.
Marble inlay pieces may sometimes warp slightly due to storage conditions or handling.
It’s important to correct this before setting the pieces permanently into the floor.
Failing to do so can cause uneven surfaces or long-term stress on the stone.
To fix warped marble inlay tiles:
By properly handling warped pieces, you preserve the integrity of the marble inlay floor design.
This attention to detail is what separates a professional result from a rushed installation.
Grouting is a key step in securing your marble inlay floor and enhancing its visual uniformity.
Using the correct grout ensures tight joints and preserves the delicate detailing of the inlay pattern.
Color matching also plays a major role in achieving a cohesive and elegant appearance.
Grouting guidelines:
Using the right grout ensures long-lasting support and clean design lines in your marble inlay floor.
Avoid overfilling joints or letting grout harden on the polished surface to prevent stains and damage.

After grouting, a careful cleaning process is essential before sealing your marble inlay flooring.
Proper cleaning removes any residues that may interfere with sealing or dull the stone’s surface.
Use only neutral and non-abrasive products to protect the finish.
Cleaning checklist:
This step preps your marble inlay flooring for sealing and ensures long-term stain resistance.
A clean surface also helps polish and surface finishes achieve better clarity and depth.
Once cleaned, polishing your marble inlay floor brings out the stone’s natural elegance and color depth.
This step enhances the reflective quality and reveals the craftsmanship of the inlay design.
Polishing also smooths transitions between tiles and medallion elements.
Polishing process:
Polishing is both functional and decorative—it protects the surface and showcases the artistry of your marble inlay floor.
Sealing is essential for preserving the quality and durability of your marble floor inlay.
Marble is porous and vulnerable to staining if not properly sealed.
Sealing instructions:
A well-sealed marble inlay flooring surface resists stains, water damage, and etching, maintaining its original beauty longer.
Depending on the application, you may consider optional treatments to modify the surface finish of your marble inlay flooring.
These finishes adjust the visual texture and functional grip of the stone to suit different interior or exterior uses.
Available treatments include:
Each option offers a distinct visual and tactile effect, allowing your marble inlay floor to meet both stylistic and safety goals.
After installing your marble inlay flooring, allowing adequate curing time is essential.
This ensures the adhesive and grout fully bond and the surface remains undisturbed.
Walking on the floor too early may cause shifting, uneven settling, or grout joint damage.
Recommended curing timeline:
Giving the flooring enough time to set ensures long-term durability and stability.
This step is critical to preserve the precision and beauty of your marble inlay floor.
Once the curing process is complete, you can safely clean your marble inlay floor.
However, the first cleaning should be gentle and follow best practices to avoid damage.
Using the wrong chemicals or tools can scratch or dull the polished surface.
Cleaning do’s and don’ts:
This first cleaning sets the tone for your floor’s long-term condition.
Handled with care, your marble inlay flooring will retain its shine and clarity.
Routine care and periodic maintenance are key to keeping marble inlay flooring in pristine condition.
Though marble is durable, it is still porous and sensitive to heavy wear or chemical exposure.
A few simple habits can dramatically extend the life of your inlay design.
Maintenance tips:
With consistent maintenance, your marble floor inlay remains as elegant as the day it was installed.
This level of care enhances both the beauty and resale value of your space.
Over time, even the finest marble inlay flooring can develop minor chips or hairline cracks.
These imperfections often result from impact, pressure, or temperature fluctuations.
Fortunately, most surface damage can be repaired without replacing the entire marble inlay floor.
For larger chips, follow this method:
For hairline cracks:
These repairs help restore your marble inlay flooring while preserving its elegant appearance.
If the damage is deep or structural, consult a professional stone restoration expert to ensure the integrity of the inlay design remains intact.
Routine care is essential to keep your marble inlay flooring looking beautiful and performing well.
Marble is a natural stone, and its porous nature requires careful cleaning with pH-balanced products.
Avoiding harsh chemicals and abrasive tools will protect both polish and inlay details.
Here’s how to maintain your marble inlay floor:
By following a regular maintenance routine, you ensure your marble inlay floor retains its original luster.
Consistent care enhances its longevity, visual impact, and overall value.
Over time, even the finest marble inlay flooring can develop minor chips or hairline cracks.
These imperfections often result from impact, pressure, or temperature fluctuations.
Fortunately, most surface damage can be repaired without replacing the entire marble inlay floor.
For larger chips, follow this method:
For hairline cracks:
These repairs help restore your marble inlay flooring while preserving its elegant appearance.
If the damage is deep or structural, consult a professional stone restoration expert to ensure the integrity of the inlay design remains intact.
In some cases, the marble inlay medallion may not arrive at the job site on time.
Rather than delaying the entire flooring project, you can proceed with tiling and leave the medallion space open.
This method allows your project to stay on schedule while still achieving a perfect marble inlay floor finish once the medallion arrives.
Here’s how to handle delayed installation:
This approach ensures the marble inlay flooring remains consistent, aligned, and ready to showcase its centerpiece at any time.
Make sure all surrounding cuts are clean to allow for seamless integration later.
Integrating a marble inlay medallion into a hardwood floor requires precision and planning.
The key is to match the height of the stone with the surrounding wood and allow for movement.
This creates a flush, professional-looking transition between two different materials.
Installation process:
This technique allows your marble inlay flooring to blend beautifully with hardwood elements.
It’s perfect for transitional spaces such as foyers or living rooms where materials meet.
Installing marble inlay flooring is an art that requires precision, patience, and the right process.
Even the most beautiful design can be compromised by small oversights or rushed execution.
Here are the most frequent mistakes professionals and DIY installers should watch out for:
An uneven subfloor is one of the top reasons marble inlay floors fail over time.
Even minor dips or ridges can cause tiles to rock, break, or misalign.
Always use a self-leveling compound or backer board to ensure a stable, flat base.
Leveling guarantees long-term durability and seamless visual flow.
Using incompatible or expired adhesives can lead to poor bonding and discoloration.
For marble inlay flooring, always use high-quality, white-based adhesives or epoxy.
Follow manufacturer instructions and check the shelf life before opening.
Never use cement-based adhesives directly on light-colored marble.
Installing without a proper dry layout often leads to misalignment and design distortion.
Always dry-lay the entire inlay and surrounding tiles to verify symmetry, spacing, and fit.
This step ensures your marble floor inlay looks centered and intentional.
Warped marble pieces may look fine when dry, but they will create uneven surfaces once installed.
Always flatten bowed medallions using sandbags or flat boards before setting.
Forcing warped pieces into place risks cracking and long-term separation.
Marble is porous and prone to stains without proper sealing.
Failing to seal after installation—and forgetting to reseal annually—can lead to moisture absorption and dulling.
Use a high-quality marble sealer and reapply every 1–2 years depending on traffic.
Avoiding these mistakes will save time, reduce repair costs, and preserve the elegance of your marble inlay flooring.
Precision and preparation are the keys to making your investment last.
A flawless marble inlay flooring installation begins with proper planning and ends with long-term care.
From subfloor leveling to medallion alignment, every detail matters.
Precision during installation not only enhances the visual beauty but also ensures structural longevity.
When done right, your marble inlay floor becomes a timeless centerpiece.
With the right adhesive, surface prep, and grouting techniques, the result will last for decades.
Don’t overlook the importance of post-installation sealing and routine maintenance—this is what keeps your investment shining.
Whether you’re installing a simple border or a custom medallion centerpiece, avoid common mistakes.
Take the time to dry-fit, align, and polish to perfection.
This attention to detail sets luxury craftsmanship apart from average flooring work.
Still not sure how to start your marble inlay flooring project?
Contact us today for expert guidance, custom designs, and professional installation support.
Let our team help you bring your marble vision to life—with precision, elegance, and durability.